
How to Increase Image Quality Without Losing Detail
By Maria · 2026-06-17
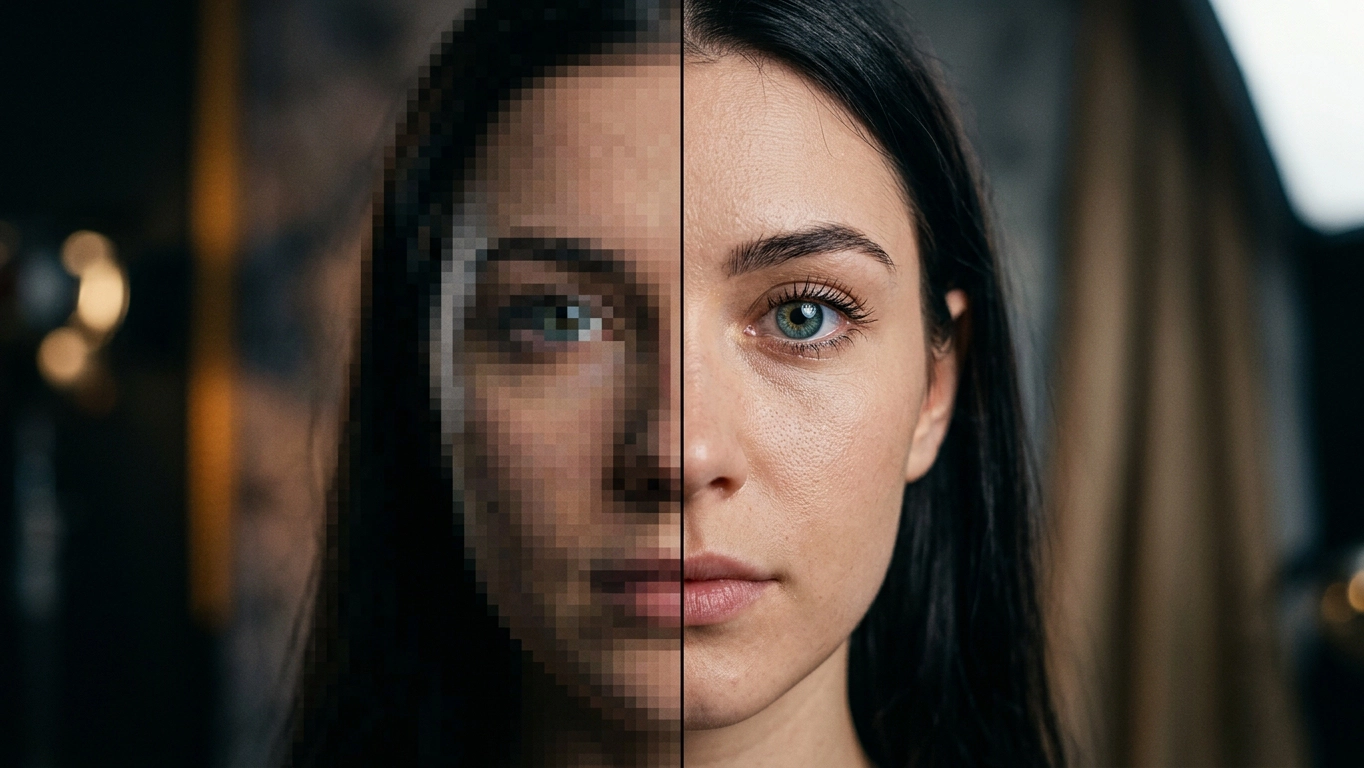
Learn how to improve image quality without losing detail using AI tools, RAW format and WebP. Discover best enhancers and export settings for web optimization.
Many people assume that resolution alone determines quality, but that’s not entirely true—resolution only measures the number of pixels, while true quality also depends on clarity, color accuracy, and detail preservation. Poor image quality can negatively impact user experience, making photos look blurry, pixelated, or unprofessional, which may also harm website performance and SEO if visuals fail to engage visitors. That’s why many creators, designers, and website owners look for ways to increase image quality without losing detail. Modern tools such as an AI Photo Upscaler can help enhance sharpness, recover fine details, and improve the appearance of low-resolution images, making them look clearer and more professional. Whether your goal is to improve photo quality, enhance image resolution, or simply achieve better visual impact, there are several effective methods available.
Ready to transform your images? Let’s explore the most effective methods to enhance image quality and achieve sharper, more professional results starting today.
Quick Summary:
Improving image quality without sacrificing detail requires more than simply increasing resolution. Poor compression and incorrect export settings can significantly reduce image quality and remove important visual details. In this guide, you'll learn how AI-powered enhancement tools can intelligently restore textures and sharpen images while preserving a natural look. We'll cover the best options available, including AI enhancers like Betatum and professional editing software, along with expert recommendations such as shooting in RAW format and using modern image formats like WebP to keep your visuals sharp, professional, and optimized for the web.
Why Images Lose Quality
Images often lose their clarity and detail due to several common factors during editing, saving, or sharing. Understanding these causes can help you avoid unnecessary quality loss and maintain sharper visuals.
Compression: Many image formats reduce file size through compression, which can remove important visual data and lead to blurry or pixelated images.
Resizing: Enlarging an image beyond its original resolution stretches the pixels, making the image appear soft or distorted.
Screenshot Quality Loss: Screenshots usually capture images at the screen’s display resolution, which is often lower than the original file quality.
Multiple Exports: Every time you re-save an image, particularly in lossy formats like JPEG, you lose more visual data, causing a noticeable drop in quality over time.
Social Media Compression: Platforms like Instagram, Facebook, and X automatically compress images to reduce file size, which can noticeably lower image clarity.
Wrong Format Selection: Choosing an unsuitable file format (for example, saving a detailed graphic as a low‑quality JPEG) can cause unnecessary loss of detail and color accuracy.
"The single most important component of a camera is the twelve inches behind it."
— Ansel Adams
Can You Really Increase Image Quality Without Losing Detail?
Many people ask whether it's truly possible to improve image quality without sacrificing detail. The answer is yes, but only when the right technology is used. The key is understanding the difference between basic upscaling and intelligent image enhancement.
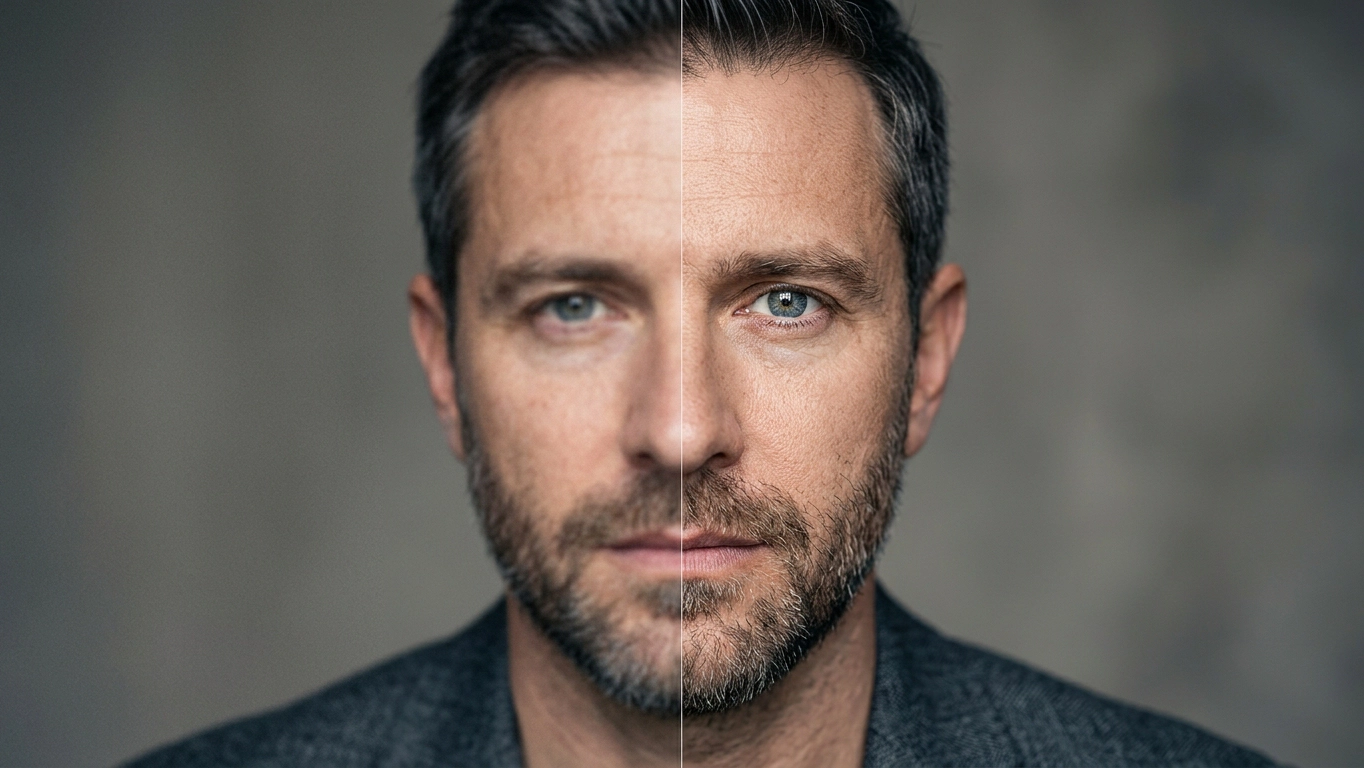
Traditional upscaling simply enlarges existing pixels, often producing images that appear blurry, soft, or lacking in detail. True enhancement goes beyond resizing by analyzing the image and reconstructing missing visual information. While no tool can perfectly recover data that was never captured in the original file, modern AI-powered technology can dramatically improve perceived image quality.
Instead of merely stretching pixels, advanced AI models are trained on millions of images to recognize patterns, textures, edges, and fine details. Using this knowledge, they can intelligently generate realistic details and restore clarity in low-resolution images. The result is a sharper, cleaner, and more professional-looking image that closely resembles a high-quality original.
Although AI cannot literally recover lost data, it can create highly accurate visual reconstructions that make images look significantly more detailed and visually appealing than with traditional editing methods.
Methods to Increase Image Quality (Without Losing Detail)
Improving image quality without sacrificing detail requires using the right techniques and tools. Simply enlarging an image is rarely enough; effective enhancement involves preserving texture, reducing noise, and optimizing resolution through smarter processing methods. Below are some practical approaches that can help you increase image quality, improve photo resolution, and achieve clearer, more professional-looking results.
Use Betatum AI
AI-powered tools like Betatum AI can significantly enhance image quality by intelligently reconstructing missing details instead of just stretching pixels. By analyzing patterns, textures, and edges, AI models can upscale images while maintaining natural sharpness. This approach helps users enhance photo quality and upscale image quality without creating the blurry artifacts that traditional resizing methods often produce.
Increase Resolution with Professional Software
Professional editing tools such as Photoshop, Lightroom, or specialized upscaling software allow you to increase photo resolution more carefully. These programs use advanced interpolation techniques to add pixels in a way that preserves edges and textures. When used properly, they can help improve image resolution while minimizing distortion or loss of clarity.
Proper Image Sharpening Techniques
Sharpening is one of the most effective ways to make an image appear clearer. However, excessive sharpening can introduce halos or unnatural edges. Applying sharpening selectively—focusing on important details like edges and textures—can make an image clearer while maintaining a natural look.
Noise Reduction Before Enhancing Quality
Noise and grain can become more noticeable when increasing resolution or sharpening an image. Applying noise reduction before enhancement helps create a cleaner base image. This step ensures that when you improve image quality, you are enhancing real details rather than amplifying unwanted noise.
Choosing the Right Image Format
The format you choose plays a major role in maintaining image quality. Lossless formats like PNG or TIFF preserve more detail during editing, while formats such as JPEG apply compression that may reduce clarity over time. Selecting the correct format ensures that your efforts to enhance image quality are not undone during saving or exporting.
Online Tools to Improve Image Quality (No Installation Required)
For those who need quick results without installing heavy software, web-based image enhancers offer a convenient alternative. Whether you are on a mobile device or a desktop, these tools provide a fast track to better visuals.
AI-Based Online Image Enhancers
The rise of AI has democratized high-end photo editing. Many online platforms now use powerful cloud-based AI models to automatically upscale images, remove noise, and fix lighting issues. By simply uploading a photo to these services, you can enhance image quality instantly, as the AI processes the file on their servers and delivers a polished version ready for download. This is often the fastest way to make an image clearer if you are working with limited hardware or time.
Free vs. Paid Tools
You will generally find two categories of online tools:
Free Tools: These are excellent for casual users, social media posts, or occasional edits. They are often ad-supported and might have limitations on the number of daily uploads or the maximum file size/resolution you can export.
Paid/Freemium Tools: These platforms offer more sophisticated AI models, batch processing, and higher-resolution exports. Subscription models or “credit-based” systems are common here. For professional designers or business owners looking to improve photo quality at scale, these premium tools are usually worth the investment due to the superior quality of the output.
Pros and Limitations of Web-Based Solutions
Web-based editors come with clear advantages but also specific trade-offs:
Pros: They are incredibly accessible, platform-independent (work on browser), and usually require zero technical knowledge. They save you from installing complex software and utilize powerful cloud hardware to do the heavy lifting.
Limitations: The main drawback is privacy—since you must upload your images to a third-party server, you have less control over your data. Additionally, you are often limited by internet speed, file size caps, and subscription costs if you need professional-grade features. While they are great for convenience, they may not offer the same level of granular control as professional desktop software like Photoshop.
Best Export Settings for High-Quality Images
Choosing the right export settings is essential to maintain image clarity and detail after editing. Even if you successfully improve image quality during the editing process, poor export settings can introduce compression artifacts, blur, or unnecessary file size increases. For web use, images typically perform best when optimized for pixel dimensions rather than DPI, while printed images usually require 300 DPI to maintain sharpness and professional quality.
When exporting as JPEG, a quality setting between 80% and 90% generally offers the best balance between file size and visual clarity. To reduce file size without noticeable quality loss, modern formats like WebP can provide better compression while preserving detail. Additionally, when preparing images for social media platforms, exporting with the recommended dimensions and aspect ratios (for example, 1080px width for many platforms) helps prevent aggressive platform compression and keeps your images looking clear and professional.
Common Mistakes When Increasing Image Quality
Even the most advanced image enhancement tools can produce disappointing results if they are used incorrectly. Understanding and avoiding these common mistakes will help you achieve better image quality while preserving a natural and professional appearance.
Over-Upscaling Low-Resolution Images: One of the most frequent mistakes is attempting to enlarge a very small image far beyond its original dimensions. Although AI can intelligently reconstruct missing details, it cannot create unlimited information from a tiny source file. Excessive upscaling often leads to unrealistic textures, distorted features, and an artificial appearance that reduces overall image quality.
Applying Too Much Sharpening: Sharpening can improve clarity, but overusing it often does more harm than good. Excessive sharpening creates visible halos around edges, exaggerates digital noise, and makes images look harsh or unnatural. For the best results, sharpening should be applied carefully and in moderation to enhance detail without introducing distracting artifacts.
Choosing the Wrong Enhancement Tool: Different AI enhancement tools are designed for different types of images. Some models excel at restoring portraits and facial details, while others are optimized for landscapes, artwork, illustrations, or scanned documents. Using an unsuitable tool can result in distorted edges, inaccurate textures, or unnatural-looking details. Selecting the right model for your specific image type is essential for achieving high-quality results.
Saving Images with Heavy Compression: Enhancing an image is only part of the process. Saving the final file using aggressive compression settings can quickly undo all the improvements. Low-quality JPEG exports often introduce compression artifacts, blocky areas, and loss of fine detail. To preserve image quality, use high-quality export settings and modern formats whenever possible, especially when images will be displayed online or used professionally.
Comparison of Methods: Which One Is Best?
Different image enhancement methods offer varying results depending on quality, file size, and intended use. Choosing the right approach depends on whether you prioritize maximum detail, smaller file sizes, or fast processing.
| Method / Format | Quality | File Size | Best For |
|---|---|---|---|
| AI Image Enhancement | Very high – reconstructs details and textures | Medium to large | Restoring old photos, improving low‑resolution images |
| Professional Editing Software (Photoshop, Lightroom) | High – precise manual control | Medium | Professional editing, photographers, designers |
| Online AI Tools | Medium to high | Medium | Quick improvements without installing software |
| Standard Upscaling (Basic Resizing) | Low to medium – may create blur | Medium | Small size adjustments when quality is not critical |
| Modern Formats (WebP / AVIF) | High quality with efficient compression | Small | Websites and fast-loading web images |
| JPEG Export | Good but lossy compression | Small to medium | Social media, general web use |
Pro Tips to Prevent Image Quality Loss in the Future
Preventing quality loss is much easier than fixing it later. By building a solid workflow from the moment you capture an image, you ensure professional results every time.
Start with High-Quality Source Images: Remember the “Garbage In, Garbage Out” rule. If your initial file is blurry, pixelated, or compressed, no AI tool can perfectly reconstruct it. Always aim for the highest resolution and best lighting conditions possible when capturing or selecting your base image.
Camera and Smartphone Settings: If you are using a smartphone, ensure your lens is clean—a smudge is the #1 cause of “low-quality” smartphone shots. In settings, disable “digital zoom” (which crops and interpolates, destroying quality) and choose the maximum native resolution provided by your device.
Using RAW Format for Photography: If you have a professional camera or a modern smartphone with “Pro” modes, shoot in RAW. Unlike JPEG, which compresses data and throws away information to save space, RAW files keep all the sensor data. This gives you much more headroom for editing (brightness, contrast, and color balance) without introducing artifacts.
Optimizing Images Before Publishing Online: High quality doesn’t mean “unnecessarily large.” Before uploading, resize your image to the exact dimensions required by your website (e.g., don’t upload a 4000px image for a 600px sidebar). Use modern formats like WebP or AVIF instead of standard JPEG; these formats offer superior compression, maintaining higher visual fidelity at much smaller file sizes.
Conclusion
Increasing image quality is not a one‑size‑fits‑all process. The best approach often depends on the user’s experience level and the tools available. Beginners usually benefit most from a reliable image quality enhancer that can automatically upscale images and make images clearer with minimal effort. Intermediate users may combine these AI tools with basic editing adjustments such as sharpening, noise reduction, and color correction. Advanced users, including photographers and designers, often rely on professional software like Photoshop or Lightroom to fine‑tune every detail and maintain full control over the editing process.
In many cases, the most effective workflow is a combination of AI enhancement and professional editing tools. AI can intelligently reconstruct missing details and improve resolution, while professional software allows for the precise adjustments needed to refine the final image. By combining both approaches, users can achieve sharper, more professional results while maintaining optimal file size and image integrity.