AI Image Censoring vs Blurring: Which Is Better?
By Maria · 2026-08-09
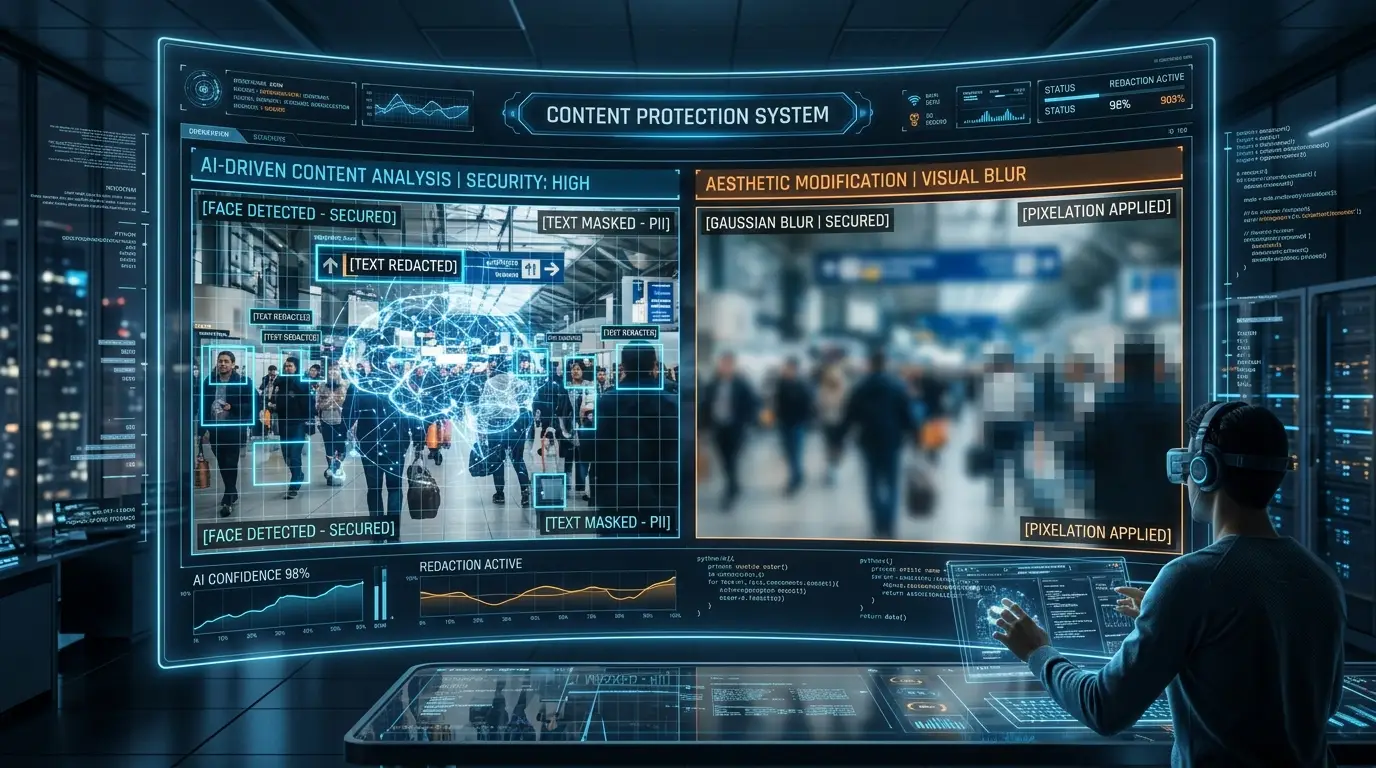
AI censoring and image blurring can both hide sensitive content, but they work very differently. Learn when to use each method, what privacy risks to watch for, and why blur is not always secure
You need to publish an image but notice a license plate, a stranger’s face, or private information. You apply a blur and assume it is safe. But beware: a basic blur can still reveal context, shapes, or recoverable pixel patterns.
So, in the debate of AI image censoring vs blurring, which is better? AI image censoring is better for automatic detection, high-volume moderation, and policy-based workflows. Blurring is best for quick, subtle edits when you already know what to hide. However, a weak blur is never a secure redaction method for highly sensitive data.
Keep in mind, these two are not direct opposites. AI censoring is the broader detection process, while a blur is just one way to cover the detected area. Let’s explore how to choose the safest method for your content.
Summary
This guide explains the difference between AI image censoring and traditional image blurring, including when each method is appropriate and where its privacy limitations begin. It covers how AI can detect and moderate sensitive regions at scale, why a light blur may not be enough for faces, passwords, or confidential information, and when stronger options such as pixelation, opaque redaction, cropping, or full-image blocking are safer.
You will also learn how to build a safer moderation workflow, review AI-generated censoring results, avoid common privacy mistakes, and choose the right output for public previews, age-gated content, business workflows, and high-risk images.
AI Censoring vs. Blurring: The Key Difference Explained
The key difference is that AI image censoring automatically finds and classifies sensitive content, whereas image blurring is merely a visual effect applied to a selected area. AI censoring can apply blurring, pixelation, or blackout. However, neither method is secure unless the sensitive region is accurately detected and strongly obscured.
Factor | AI Image Censoring | Image Blurring |
|---|---|---|
What it is | A detection and moderation workflow | A visual editing effect |
Detects sensitive content | Yes, depending on the model | No |
Requires manual selection | Not always | Usually |
Can use multiple outputs | Yes (blur, blackout, etc.) | No; blur only |
Best for | Moderation, automation and scale | Quick, low-volume edits |
Main risk | Detection errors | Weak or incomplete obscuring |
Privacy strength | Depends on the selected output | Depends heavily on blur strength |
What AI Image Censoring Actually Does
So, how does an Censor AI actually work? Instead of just throwing a blur effect on a photo, it acts like a smart filter. It scans the picture, understands what is inside it, and decides what to do based on your rules.
The whole workflow usually breaks down into four main actions:
Detect the Sensitive Region
First, the AI uses computer vision to “see” the image. It scans the pixels to find specific things like nudity, faces, license plates, explicit regions, or other categories you configure.
Keep in mind that detection capabilities differ between tools. Not every AI censor can identify every type of sensitive content. Some are built specifically to find faces, while others are trained strictly for adult content moderation.
Classify the Level of Risk
Once the AI finds a sensitive region, it generates a “confidence score.” This score shows how sure the AI is about what it found. The system then compares this score against your moderation categories and policy thresholds.
Here is a practical example of how this helps:
Swimwear: The platform may allow this to pass normally.
Partial Nudity: The platform may restrict it or lower its visibility.
Explicit Sexual Content: The platform will fully block it.
The important point is that AI censorship can respond differently to different categories, instead of just applying the exact same blur to every single image.
Apply the Selected Censoring Method
After deciding that an image needs to be hidden, the AI applies the visual effect. Depending on your platform’s rules, the AI can hide the sensitive parts using several methods:
Blur: Making the specific area out of focus.
Pixelation: Turning the sensitive region into large, blocky squares.
Solid mask: Covering the area with a graphic or shape.
Blackout: Completely painting over the sensitive part with black.
Cropping: Cutting the restricted region out of the image entirely.
Full-image blocking: Rejecting the whole image so it never goes live.
Warning screen or age-gated preview: Putting a clickable warning over the image for adult users to choose if they want to see it.
Send Uncertain Cases for Review
No AI is 100% perfect. Sometimes, the computer gets confused by ambiguous images. Things like unusual poses, classical artwork, medical imagery, tricky reflections, and partially visible subjects can easily trick the system.
When the AI is not sure if an image breaks the rules, it flags it for a real person to check. Using human-in-the-loop moderation for these edge cases ensures that your platform stays safe without accidentally deleting harmless pictures.
What Blurring Hides and What It Leaves Behind
To understand why blurring is so popular, it helps to know exactly what it does to an image.
Take Gaussian blur, for example. In simple terms, this effect averages the colors of neighboring pixels. It removes sharp details and fine lines, but it preserves the general shape, color, and overall composition of the image. Because of this, a blurred edit looks much softer and less intrusive than slapping a solid black box over a photo.
However, there is a catch: a blur effect does not understand what it is hiding. If a human moderator uses a blur tool but accidentally misses a small corner of a license plate, part of a face, or a piece of explicit content, the blur effect will not automatically correct that mistake. The missed detail remains fully visible.
Manual Blur vs. AI-Assisted Blur
When applying a blur, the method you choose changes the workflow entirely. We can break this down into two main approaches:
Manual Blur: This is the traditional method. A user manually selects an area using a brush or a digital mask, and the software applies the blur to that exact spot. It requires time, effort, and human precision.
AI-Assisted Blur: The software automatically detects a specific object (like a face or a license plate) and applies the blur directly to it.
You can apply these effects as a full-image blur (hiding the entire picture) or a targeted regional blur (hiding only specific parts). It is important to note that if an automated tool detects a face and blurs it for you, that process is technically a form of AI image censoring.
Why Blur Often Looks Better
From a design and user experience perspective, blurring is usually the preferred choice for content moderation. Here is why:
Softer visual appearance: It is easier on the eyes than solid shapes or heavy pixelation.
Better context retention: Users can still understand the general setting or color scheme of the photo without seeing the sensitive details.
Less disruptive thumbnails: A blurred thumbnail looks more professional on a webpage or feed.
More natural previews: It gives users a hint of what the image contains, which is useful for platforms that use age-gated warning screens.
Reduced visual harshness: It avoids the “crime scene” look that comes with thick black bars.
Why Looking Hidden Is Not the Same as Being Secure
While blurring looks great and keeps your platform visually appealing, it creates a false sense of security. A blurred image might look completely safe to the human eye, but the original pixel data hasn’t been destroyed—it has just been mixed around.
This brings us to a major privacy risk: just because something looks hidden, doesn’t mean it is permanently secure.
AI Image Censoring vs. Blurring at a Glance
To choose the right approach for your platform, you need to look at how these methods handle scale, accuracy, and workflow. Here is a quick side-by-side comparison of AI image censoring and manual blurring.
Comparison Factor | AI Image Censoring | Manual or Basic Blurring |
|---|---|---|
Detection | Automatically finds configured sensitive regions | User must find each region |
Processing speed | Faster for large image volumes | Fast for one image, slow at scale |
Scalability | Suitable for batch and API workflows | Difficult to maintain manually |
Consistency | Can apply the same policy repeatedly | Depends on the individual editor |
Context awareness | May classify different content categories | Has no contextual understanding |
Visual subtlety | Depends on selected output | Usually soft and visually discreet |
User control | Policy settings plus manual review | Direct control over every mask |
False positives | Possible | Not applicable to detection |
Missed regions | Possible if detection fails | Possible through human oversight |
Privacy strength | Depends on blur, pixelation or blackout settings | Depends mainly on blur strength |
Best use | UGC moderation, age gates and large libraries | Small numbers of known regions |
Main limitation | Model errors and policy configuration | No automation or classification |
An Important Note on Security:
It is a common misconception that AI is automatically more secure than manual editing. In reality, privacy strength depends entirely on the method applied, not just who (or what) applies it. For example, an AI system programmed to apply a very weak blur is actually less secure than a human editor manually placing a solid, opaque black box over a sensitive detail.
Which Method Wins for Your Use Case?
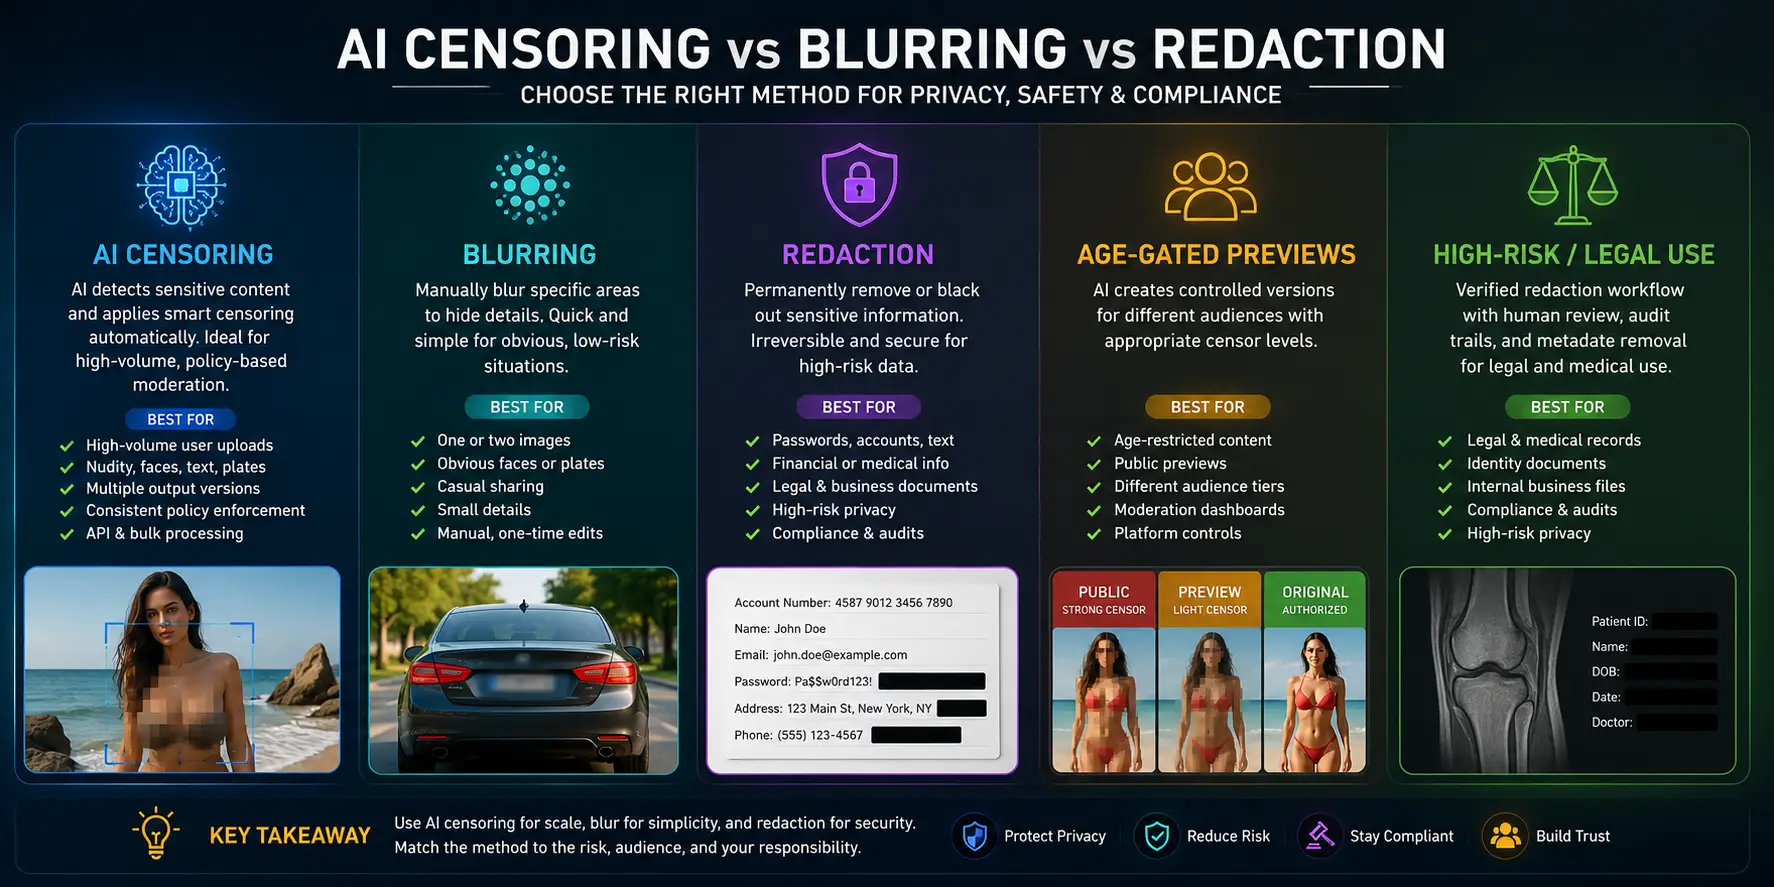
The best choice depends on what you need to hide, how many images you handle, and how serious the privacy risk is. Use this quick guide to choose between AI censoring, blur, and permanent redaction.
For High-Volume User-Generated Content: AI Censoring Wins
AI censoring is usually the most practical option when users upload thousands of unpredictable images every day.
Unlike manual editing, an AI image moderation workflow can automatically detect sensitive content, apply your moderation rules consistently, and process images in batches or through an API. This helps platforms avoid relying on reviewers to inspect every upload individually.
AI-based censoring is especially useful when you need to:
Scan large volumes of user-generated uploads automatically
Detect nudity, sexual content, faces, text, License plates, or other sensitive areas
Apply the same policy across all images
Create multiple output versions for different audiences
Send uncertain or borderline images for human review
Process images in bulk or integrate moderation into an upload flow
For example, a platform could create a lightly censored preview for adult users, a stricter public-facing version, and keep the original available only to authorised moderators or subscribers.
For high-volume moderation, AI does not fully remove the need for human review. However, it can dramatically reduce manual workload by escalating only uncertain images instead of sending every upload to a person.
For One Face or License Plate: Blurring May Be Enough
Manual blur can be a sensible choice when you only need to hide one face, License plate, address, or small detail in one or two images.
It works best when:
There are only a few images to edit
The sensitive region is obvious
The image is being shared casually rather than used in a high-risk setting
You can inspect the final image carefully before publishing
You do not need automated or repeated processing
For example, you may blur a stranger’s face in a holiday photo or hide a car plate before posting a vehicle image on social media.
However, a quick blur is not always a reliable privacy solution. Blur intensity, mask coverage, image resolution, and compression can all affect how well the information is hidden. If the blurred area is too small or too light, parts of a face, plate, or text may still be recognisable.
For Explicit or NSFW Content: AI Censoring Is More Practical
For explicit or NSFW images, AI censoring is generally more practical than applying a universal blur to every image.
A policy-based AI workflow can detect sensitive regions and apply targeted censoring only where it is needed. This preserves more of the original image while making it safer for previews, public feeds, or moderation tools.
Common use cases include:
Public previews
Age-restricted product listings
Moderation dashboards
Subscriber-only content tiers
User-generated image uploads
Community platforms with mixed audiences
This matters because not every image requires the same response. Some content may need a small censor bar or mosaic effect, while other content may need to be hidden completely, sent for review, or blocked from public display.
Meta’s policies, for example, distinguish and restrict both real and AI-generated nudity and sexual activity. This illustrates why platforms need policy-driven moderation rather than relying on one fixed blur setting for every situation.
For Passwords, Financial Details, or Confidential Text: Do Not Rely on Blur
Do not use soft blur alone to hide passwords, bank details, account numbers, private messages, medical information, or confidential business text.
Blurred text can sometimes remain partly readable, especially when the original image is high resolution. Even if individual characters cannot be read clearly, visible text patterns, lengths, layouts, or surrounding context may still make the information guessable.
For sensitive text, use a stronger method such as:
Opaque blackout boxes
Permanent redaction
Cropping the sensitive area out of the image
Replacing the original information with safe placeholder text
Exporting a flattened copy rather than sharing an editable file
Removing metadata when relevant
The key point is simple: if revealing the information could cause financial, security, legal, or privacy harm, use irreversible redaction—not blur.
For Age-Gated Previews: Use AI Detection With a Controlled Output
Age-gated content often needs more than a simple “allow or block” decision. AI detection can help platforms identify sensitive material and generate controlled versions for different audiences.
Depending on the platform, AI censoring can create:
Lightly censored previews for eligible viewers
Stronger public-facing versions
Safer-for-work (SFW) versions
Restricted originals for authorised users
Images that are held for moderation before publication
This approach gives you more control over how content appears across landing pages, search results, public profiles, paid subscriber areas, and internal moderation dashboards.
A single censoring level rarely works for every audience. What is acceptable inside an age-restricted area may not be appropriate for public search pages, app-store-facing content, or general social feeds.
For Aesthetic Social Posts: Blur Usually Looks More Natural
Blur is often the better choice when visual style matters more than strict anonymity.
For social media, editorial images, and casual posts, a subtle blur can look more natural than a harsh black box or mosaic censor. It can hide distractions while keeping the image visually balanced.
Blur works well for:
Background faces
Screens visible in the background
Unwanted contextual details
Non-sensitive spoilers
Cluttered backgrounds
Creative focus effects
For example, a photographer may blur people in the background to keep attention on the main subject. A creator may blur a screen, location detail, or spoiler without making the post look heavily moderated.
Just remember that aesthetic blur is not the same as secure anonymisation. If the subject is sensitive or identifiable, use stronger privacy controls.
For Legal, Medical, or High-Risk Privacy: Use Verified Redaction
For legal documents, medical images, patient records, identity documents, internal business files, or other high-risk material, use a dedicated redaction workflow with human verification.
A casual blur brush is not enough when the consequences of exposure are serious. Sensitive information can remain visible through incomplete masking, editable layers, metadata, hidden text, image history, or poor export settings.
A safer workflow should include:
Detecting sensitive information
Applying permanent redaction or removal
Exporting a flattened, non-editable copy
Checking the final output manually
Confirming that no metadata or hidden data remains where relevant
Keeping an audit trail if your organisation requires one
Requirements can vary by industry, organisation, data type, and location. For legal, medical, financial, or regulated use cases, organisations should obtain appropriate legal, privacy, and compliance guidance before publishing or sharing edited files.
Can AI Unblur a Censored Image?
While it is common to see claims about AI “unblurring” censored images, the reality is more nuanced than simply restoring a hidden photo to its exact original state.
What Recent Research Shows
Recent academic studies highlight that traditional blur methods are increasingly vulnerable to modern AI tools:
The Revelio Study (2025): A 2025 study evaluating a face restoration method (Revelio) reported a 95.9% re-identification accuracy on its test datasets and concluded that Gaussian blur should not be relied upon for face anonymisation. It is important to note that this is a controlled research result, not proof that every blurred image can be recovered in the wild.
The Fantômas Study (2024): The Fantômas study investigated the reversibility of various face-protection techniques and found that 11 of 15 tested face-anonymisation approaches were at least partially reversible.
The Privacy Blur Study (2025): A 2025 privacy study comparing several image obfuscation methods described Gaussian blur as the least private of the four methods it evaluated.
An AI Reconstruction Is Not Necessarily the Original Image
When evaluating these tools, the most important nuance to understand is that AI reconstruction does not actually “reveal” the hidden pixels. Instead, an AI unblurring tool works by:
Inferring likely details based on patterns it has learned from other images
Generating a plausible face that fits the blurry silhouette
Matching identity patterns against a reference database
Producing fine details that were never present in the original source image
Because of this, a restored image may look highly convincing and realistic without being a pixel-perfect recovery of the source. Sensational claims that AI can recover any blurred image overlook the fact that the output is often a smart guess rather than the actual original data.
When a Solid Mask Is Safer
When the disclosure of hidden information could lead to serious legal, financial, or personal harm, soft blur should be avoided entirely. In these cases, it is safer to use:
Opaque masking: Covering the sensitive area with a solid, solid-coloured shape.
Cropping: Removing the sensitive section from the frame entirely.
Permanent redaction: Flattening the image layers during export.
For any redaction to be secure, the covering effect must be baked directly into the pixels of the final exported file. Simply placing a movable shape or layer over the original image in an editor does not prevent someone from removing the layer later to reveal the original data underneath.
Can AI Censor the Wrong Part of an Image?
Yes. Automatic censoring is only useful when the AI identifies and covers the correct region. Like any detection system, it can make mistakes—especially when an image is complex, low quality, or contains unusual visual details.
Two common problems are unnecessary censoring and missed content.
Unnecessary Censoring
An AI tool may sometimes flag safe content as sensitive and cover it unnecessarily. This can happen with:
Artwork or illustrations
Statues and sculptures
Skin-coloured clothing
Reflections in glass or water
Close-up body parts without sexual context
Shadows, patterns, or objects with similar shapes
This may make an otherwise safe image look over-moderated or reduce its visual quality. For public-facing content, false positives can also create a poor user experience.
Missed Content
AI can also fail to detect all sensitive content in an image. Small, partially hidden, low-resolution, or overlapping subjects are more likely to be missed.
For example, a censoring tool may overlook:
A face partly hidden behind another person
A License plate in the distant background
Sensitive content visible on a phone or computer screen
A reflection in a mirror, window, or glossy surface
Small details near the edge of the image
Content obscured by shadows, objects, or motion blur
Even when AI detects the right subject, the censor mask may be too small. Always inspect the edges of the censored area to ensure the full face, body part, text, or object is covered.
Before publishing, also check the entire image for details that may appear in mirrors, reflections, screens, windows, and background areas.
For legal, medical, financial, explicit, or otherwise high-risk images, use human review rather than relying entirely on automatic detection. AI can speed up moderation, but a person should verify the final output when an incorrect censor could expose sensitive information or cause serious harm.
AI Censoring vs. Blurring for Business Workflows
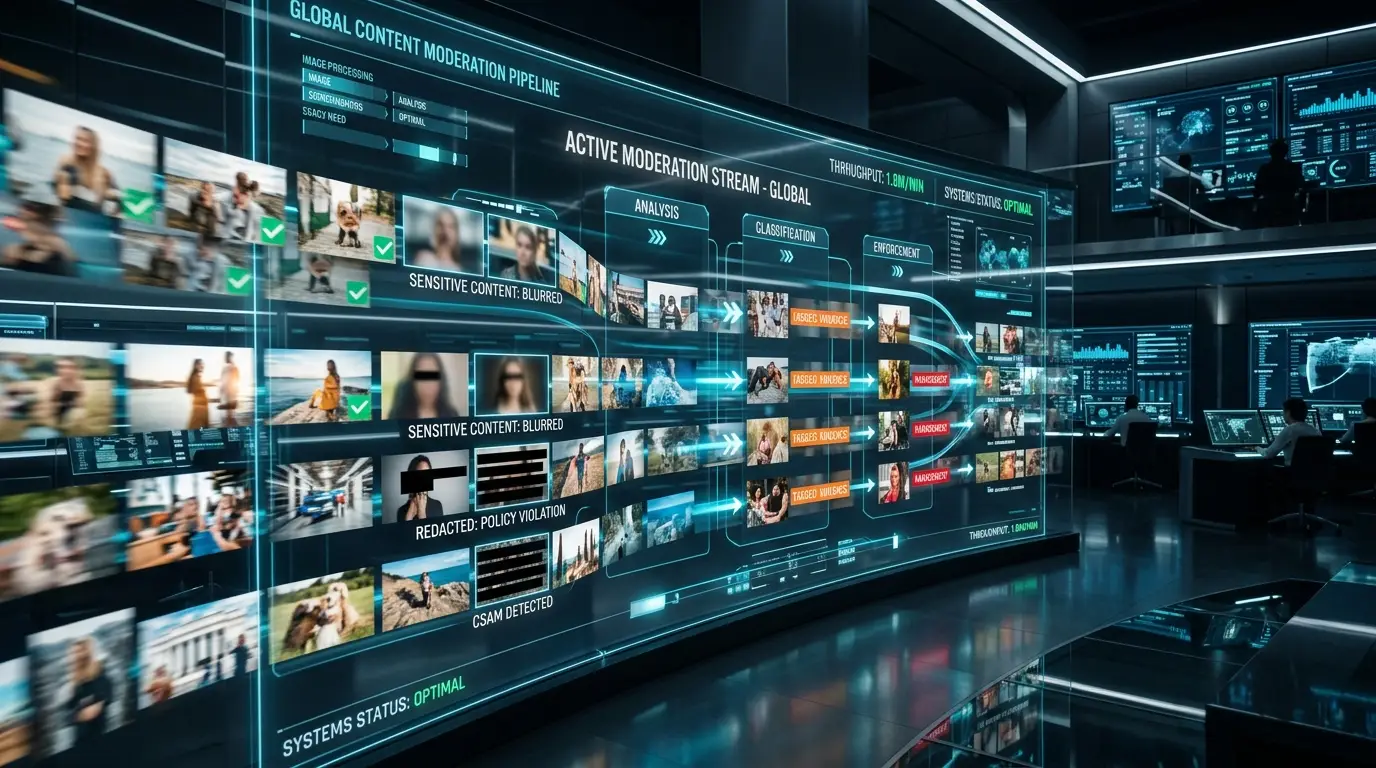
For businesses, the choice between AI censoring and manual blurring is not only about visual results. It also affects speed, consistency, operational costs, privacy controls, and the ability to scale.
Content Volume
Start with a few practical questions:
How many images arrive each day?
Are uploads predictable, or do they come from users?
Does content need to be processed in real time?
Is manual review financially and operationally realistic?
Manual blurring can work for a small, predictable image library. For example, a marketing team may only need to edit a few campaign photos each week.
However, it becomes difficult to manage when a platform receives hundreds or thousands of user-generated uploads every day. In these cases, AI censoring can automatically scan images, identify potentially sensitive regions, and apply a defined moderation rule before the content is published.
A scalable workflow may still include human reviewers, especially for uncertain or high-risk images. The main advantage of AI is that it helps teams focus their time on exceptions instead of manually inspecting every file.
Policy Consistency
Businesses often need the same content rules to work consistently across multiple channels and audience types.
This may include:
Websites
Mobile apps
Marketing channels
Moderation queues
Geographic markets
Public users and registered users
Without a standard workflow, different teams may blur, crop, block, or approve similar images in different ways. This can create inconsistent user experiences and make internal policy enforcement harder.
AI censoring can support more consistent application of rules. For example, a business may define one policy for publicly visible images and a stricter policy for app-store-facing content. It may also apply different rules based on market, product category, or content sensitivity.
Consistency does not mean using one censoring setting everywhere. It means applying the right predefined policy reliably in each context.
Different Outputs for Different Audiences
The same original image may need different versions depending on who can view it.
Possible audiences include:
Public visitors
Logged-in users
Paid subscribers
Age-verified audiences
Internal moderators
For example, a public-facing page may require a heavily censored or safe-for-work preview. Logged-in, age-verified users may see a lighter version, while internal moderators may need access to the uncensored original for review.
AI-based workflows can make this easier by creating controlled outputs from one source image, such as:
A fully public-safe version
A lightly censored preview
A restricted version for approved users
The original file for authorised internal teams
This helps businesses avoid publishing the wrong version to the wrong audience.
Batch Processing and API Access
Bulk processing and API access become essential when a business manages a large content library.
A batch workflow allows teams to process many existing images at once. This can be useful when updating old product listings, preparing a media archive, reviewing marketplace uploads, or applying a new moderation policy across thousands of files.
API access is especially valuable when censoring needs to happen automatically inside an existing workflow. For example, an API can connect image moderation to:
Upload forms
Content management systems
Marketplace listings
Social platforms
Mobile applications
Internal review dashboards
Instead of downloading, editing, and re-uploading each image manually, the system can scan and process files as they enter the platform.
For high-volume operations, this can reduce delays, lower manual workload, and make moderation more consistent.
Privacy and Data Handling
Before selecting an AI censoring or image moderation provider, businesses should evaluate how the vendor handles uploaded files and sensitive data.
Useful questions include:
Where are images processed?
How long are uploads retained?
Are original files stored after processing?
Is processing encrypted in transit and at rest?
Can outputs be reviewed before publication?
Are activity logs available?
Can reviewers override an automated decision?
Can different moderation policies be applied by channel or audience?
These questions matter when images may contain personal data, confidential documents, customer information, user-generated content, or sensitive visual material.
A good workflow should give businesses control over review, publishing, access, and retention. AI can improve speed and consistency, but organisations should understand exactly how their images move through the system before using it for sensitive or high-risk content.
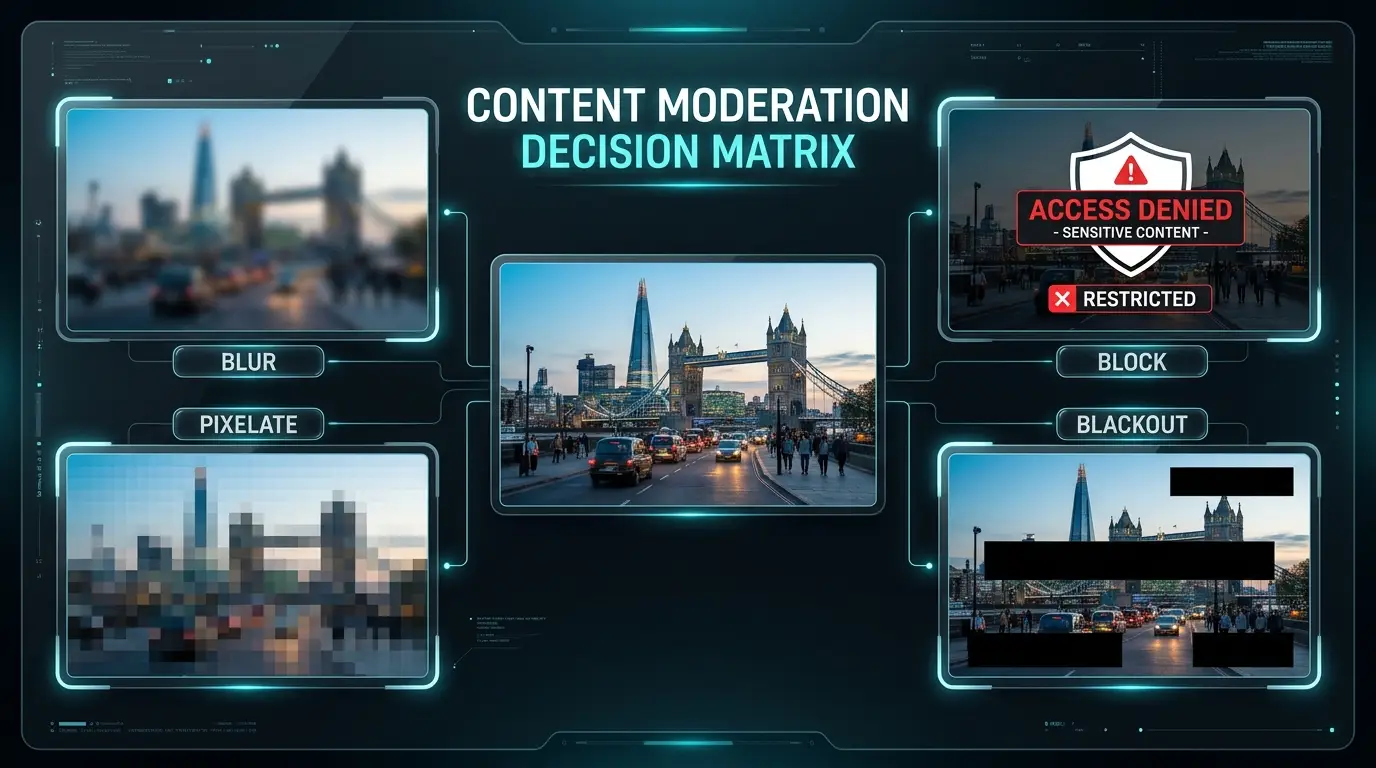
Choose the Right Output: Blur, Pixelate, Blackout or Block?
Use this decision table to choose the right image editing and censoring method for your goals:
Goal | Recommended Starting Method | Why |
|---|---|---|
Softer public preview | Strong targeted blur | Preserves visual context and general composition |
Clearly signal censorship | Pixelation | Makes the edit obvious to the viewer |
Hide confidential text | Opaque blackout or crop | Removes readable patterns and outlines entirely |
Hide a high-risk identity | Verified mask, crop, or specialist anonymisation | Provides stronger protection than a light blur |
Moderate explicit regions | AI detection plus targeted mask | Scales across unpredictable and high-volume uploads |
Prevent any public viewing | Full-image block or warning gate | Ensures no sensitive preview is shown at all |
Publish several audience versions | AI policy-based censoring | Supports repeatable and automated output levels |
Make a quick casual edit | Manual blur | Fast and simple for one obvious region |
The safest method is not always the most attractive one, and the most attractive method is not always the safest.
How to Build a Safer AI Image-Censoring Workflow
To build a reliable automated moderation workflow, you need a structured process. Avoid generic “detect unsafe content” instructions. Instead, build your pipeline using these eight practical steps.
Step 1: Define What Must Be Detected
Identify the exact content classes your system needs to identify. Clear definitions help you configure detection models and write precise guidelines for human reviewers.
Identifiable People: Faces, tattoos, unique scars, name tags, or vehicle license plates.
Confidential Text: Passwords, API keys, credit card numbers, billing addresses, signatures, or government ID numbers.
Explicit Material: Exposed intimate areas, medical procedures, or violent imagery.
Branded Content: Third-party logos, copyrighted designs, or trademarked material.
Step 2: Separate Detection From the Final Action
Do not hardcode your detection system to apply a single action. Once your system flags a sensitive region, route it dynamically based on the context.
A flagged region should trigger one of these specific actions:
Blur: Reduce details while keeping the overall shape.
Pixelate: Distort the region into large blocks to signal editing.
Cover: Apply an solid, opaque color block over the coordinates.
Reject: Block the upload entirely and notify the user.
Review: Hold the image in an admin queue for human verification.
Gate: Place the image behind an opt-in warning screen.
Step 3: Match the Output to the Risk
Using one visual treatment for every scenario creates usability and security issues. Tailor your output method to the risk level of the data.
Low-Risk Data: A background face in a crowd scene can be blurred or pixelated. This protects identity while keeping the visual context of the image.
High-Risk Data: Passwords, credit card numbers, and bank details must be covered with solid color blocks or cropped out completely. Do not use blur or pixelation here, as these patterns can sometimes be reversed.
Step 4: Test Borderline Cases
Automated systems often struggle with non-standard files. Test your pipeline against these specific edge cases to identify where it might fail:
Low Light & Shadows: Faces or text obscured by poor lighting.
Small or Distant Subjects: Tiny elements in high-resolution backgrounds.
Unusual Poses: People lying down, angled away, or partially obstructed.
Crowded Scenes: Overlapping subjects that confuse bounding boxes.
Artistic Interpretations: Paintings, illustrations, or sculptures.
Reflections: Glass windows, mirrors, or wet surfaces showing sensitive areas.
Diverse Skin Tones: Check for consistent detection rates across all skin tones.
Highly Compressed Files: Low-quality JPEG images with heavy artifacts.
Step 5: Add Human Review Where Consequences Are High
Automation handles scale, but human judgment is necessary when errors carry legal, financial, or emotional consequences.
Ensure a human editor reviews uploads in these categories:
Legal evidence or court documents
Intimate or sensitive user-generated content
Medical records and clinical imagery
Public records and government-archived media
Step 6: Inspect the Final Export
Before publishing or sharing an image, verify that the censorship is permanent and cannot be reversed by a technical user.
Zoom In: Check the edges of the censored area to ensure no details bleed through the boundaries.
Flat Image Layers: Flatten the image (e.g., export to a flat PNG or JPEG) so the censorship layer cannot be moved or deleted in editing software.
Check Thumbnails: Verify that system-generated previews, icons, and thumbnails do not display the uncensored original.
Clean Metadata: Remove EXIF data, GPS coordinates, camera details, and original filenames that might leak private information.
Step 7: Save the Original Separately
Never overwrite your only source file with the censored version. Keep your original assets intact and store them securely.
Save original files in a secure, restricted-access storage bucket.
Apply strict access controls so only authorized roles can view originals.
Generate and export censored files as separate, uniquely named files.
Step 8: Review Performance Regularly
An automated workflow requires ongoing maintenance. Track these metrics monthly to evaluate the health of your moderation pipeline:
Metric | What It Measures | Target Direction |
|---|---|---|
False-Positive Rate | Safe images flagged incorrectly as unsafe | Down |
False-Negative Rate | Unsafe images missed by the system | Down |
Manual Override Rate | How often human moderators reverse AI decisions | Down |
Average Review Time | Time an image spends waiting in the human queue | Down |
Escalation Percentage | Percentage of uploads requiring human intervention | Stable |
Policy Consistency | Rate of uniform enforcement across different apps/web | Up |
How to Censor an Image With Betatum
Betatum makes it easy to create a censored version of an image without rebuilding the whole image manually. The basic workflow is simple: upload the image, select what needs protection, choose the right censoring method, and export a final flattened file.
1. Upload Your Image
Start by uploading the source image you want to edit. Before continuing, check that you are using the correct version of the file—especially if it contains private information, customer content, or sensitive material.
For high-risk images, keep the original stored separately and work only on a duplicate.
2. Identify What Needs Censoring
Select the specific area that should be hidden. This may include:
Faces or identifying features
License plates
Passwords and login details
Credit card or bank information
Phone numbers and addresses
Intimate or explicit regions
Medical, legal, or confidential records
Avoid censoring more of the image than necessary when visual context matters. At the same time, leave enough coverage around sensitive text or objects so that edges do not reveal useful details.
3. Choose the Right Censoring Style
Select the output based on the sensitivity of the content.
Blur: Useful for softer public previews and low-risk identity protection.
Pixelation: Makes censorship visually obvious and works well when context can remain visible.
Blackout or solid cover: Best for passwords, financial information, IDs, and other confidential text.
Crop: Removes the sensitive area entirely when it is near the edge of the image.
Full-image block: Use when no preview should be visible publicly.
For sensitive personal data, do not rely on light blur alone. Use an opaque cover or crop instead.
4. Review the Censored Area
Before exporting, zoom in and inspect every censored region.
Check that:
The full face, text line, or sensitive object is covered
No details appear around the edges
Reflections in mirrors, windows, or screens are also handled
Background text, badges, thumbnails, or metadata do not expose private information
The image still communicates what viewers need to understand
If the image contains several people or multiple sensitive regions, inspect each one individually.
5. Export a Final, Flattened Version
Export the edited image as a separate final file. Make sure the censoring is permanently applied to the pixels rather than left as an editable overlay or removable layer.
A safe export process should ensure that:
The original file remains stored separately
The censored version has a clear filename
No uncensored thumbnail is generated for public use
Metadata does not reveal private information, such as location data or original filenames
Only the censored version is uploaded, shared, or published
For high-volume workflows, Betatum AI can be used as part of a repeatable review process: detect sensitive regions, apply the appropriate action, inspect exceptions, and publish only approved outputs.
Common Mistakes That Make Censored Images Less Safe
Even when an image looks censored at first glance, small mistakes can still leave private details exposed. These are some of the most common problems to watch for.
Applying a Blur That Is Too Weak
Why it fails: Shapes, text patterns, and facial structure may still remain recognisable, especially when the original image is sharp or high resolution.
Better approach: Increase the censoring strength or switch to an opaque mask for sensitive information such as IDs, financial details, or private text.
Treating AI as a Set-and-Forget System
Why it fails: AI can miss unusual, small, distorted, or ambiguous regions. It may also censor the wrong thing.
Better approach: Review uncertain and high-risk outputs instead of trusting automation blindly. AI is useful for scale, but not perfect judgment.
Using One Censoring Level for Every Audience
Why it fails: A public preview, a logged-in area, and an age-verified section may all need different levels of restriction.
Better approach: Create policy-based output versions so each audience sees the right level of censoring.
Blurring Passwords or Account Numbers
Why it fails: Even when the exact characters are hidden, character length, spacing, and visual patterns may still remain visible.
Better approach: Remove, replace, crop, or black out the information completely instead of using blur alone.
Forgetting Secondary Sensitive Details
Why it fails: The main target may be censored, while other identifying details remain visible elsewhere in the image.
Common missed details include:
Mirrors
Reflections
Background screens
Tattoos
Name badges
Street signs
License plates
Faces in posters
Better approach: Check the whole image, not just the obvious subject.
Covering the Image With a Removable Layer
Why it fails: If the censoring is added as an editable overlay, the original pixels may still exist underneath and could be revealed later.
Better approach: Export a flattened copy with the redaction permanently baked into the final image.
Ignoring Metadata and File Names
Why it fails: GPS data, personal names, job numbers, or internal identifiers may still be attached to the file even when the visible content looks safe.
Better approach: Inspect the complete asset, not only its visible pixels. Remove metadata and rename files when needed.
Assuming an AI-Unblurred Result Must Be Accurate
Why it fails: Generative tools can produce convincing reconstructions that look realistic but are partly invented.
Better approach: Treat AI reconstructions as estimates unless they are independently verified. Plausible does not always mean correct.
Final Verdict
Selecting the right image-censoring method depends on your volume, your audience, and the level of risk involved. You should choose AI image censoring when images arrive at scale, sensitive regions are unpredictable, or different audiences require different levels of restriction, while manual blur remains ideal when editing a small number of low-risk images where the exact region is already known.
However, for sensitive data where revealing the underlying information could cause serious privacy, legal, or safety harm, always opt for opaque redaction, cropping, or blocking, and combine AI with human review when both speed and accuracy matter. Need to prepare safer, public-facing versions of sensitive images? Try Betatum’s AI Censor and compare different censoring levels before publishing.